1. Test overview.
This test is used for adjusting the sharpness level so that it is initially able to carry out the four following tests. Then, an precise adjustment will be made to reach the best sharpness result.For that, the scanner is to scan a target film, and will decide of a sharpness level in the middle of film. The user will be brought to adjust the principal lens to increase the sharpness level.
If the sharpness is insufficient at this stage, the four following tests will not not work :
2. Test conditions.
This test relates to the 135 Film carrier inserted in the scanner.The 135 Film carrier must be inserted in the scanner to carry out this test.
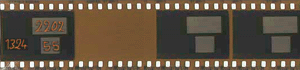
The 135 Film Colour Target Film must be used for this test (ref. 070 100 415A):
No parameter is saved.
3. Pre-requirements.
- Have the adjustment tool handy for the principal lens or failing this use a small flat screwdriver.
4. Test realisation.
Click on RUN to execute the test. A message will appear asking to insert the 135 Colour target film. When the film is inserted (Caution : watch for the direction of insertion of film), click on OK.Note : the colour target film consists of :
- First exposure on which values are noted by hand, in particular the value of sharpness to be reached for this film.
- Second virgin exposure on which the scanner will calculate the level of sharpness.
- Third and fourth identical exposures to the first but not used.
- The part of the second image where the calculation of the level of sharpness was made.
- Part of the first image where the sharpness level seen is to be reached.
Note : The sharpness value can vary from one scanning to another, sometime from 4 to 5 points. This results come from the fact that the film is never scanned exactly at the same place.
On the right side of the screen, a history of the positions of the principal lens enables to remember in which position you are in. Thus click on the position in progress (by 1/8 of turn).
5. Acceptation du test.
The test is accepted if the calculated level of sharpness (MIDDLE) is higher than 75% of value MIN TO REACH.6. Other affected tests.
If the sharpness is not sufficient at this stage, the 4 following tests could not correctly be made :- 135 Pre-Scan IR.
- 135 Cal Pre-V-Offset On Edges.
- 135 Cal Pre-V-Offset.
- 135 Cal RGB-IR.