1. Test overview.
This test is used for adjusting the lens to find the maximum and equivalent top and bottom sharpness at the expected CoeffG.This test can be done only on IM1500 Pro version of the scanner, because it is equiped with new lens mounting, which enables a quick sharpness adjustment.
For that, the scanner scans permanently a target film, and will show the sharpness level in the middle, top and bottom of film. The user will be brought to adjust the top and bottom gate screws the sharpness level.
2. Test conditions.
This test relates to the 135 Film carrier inserted in the scanner.The 135 Film carrier must be inserted in the scanner to carry out this test.
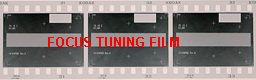
The 135 BW Focus Tuning Film must be used for this test :
No parameter is saved.
3. Pre-requirements.
- The scanner must be equiped with the new adjustable lens mounting. If it is not the case, use the 135 Sharpness CoeffG test.
- Test "135 Focus CoeffG Adjust" done.
4. Test realisation.
Click on RUN to launch the test. A message will appear asking to enter the theoritical size of the image (written down by hand on the film, about 2200). When it is done, click on OK. A message will be displayed requiring the insertion of the 135 BW Focus Tuning film. When the film is inserted (caution watch for the direction of film), click on OK. Another message appears asking to "force calibration ?". Click on No (see troobleshooting section for this option, important in case of problem).
The useful part of this film is in the center of the image, where there is in the middle, the top and bottom, 9 black lines. These targets will be used to calculate the coeffG and Sharpness values.
The scanner will take the film until the beginning of the film is detected by the CCD. Then the film will progress slowly until the CCD detects the targets.
At this point, the film will not move any more, and the scanner will do continuous acquisitions on this target.
An orange curve is the result of these acquisitions, displayed in the graph window : X axis is the coeffG position (the center of the X axis is the expected coeffG, size of the X axis is 60 pixels). Y axis is the sharpness value (the higher it is, the more sharpen it is).
There is also a red and green curve reprensenting top and bottom sharpness.
The blue curve represents the current position. The 2 vertical lines represents the lower and higher limit for CoeffG (green if current position is within the tolerance, red if outside).
- 1. Status of the current top/bottom sharpness : This is done to define the actions to be done to obtain a good top/bottom sharpness at correct CoeffG. To do that, scroll the complete X axis (don't leave any blank point). The result should be 3 curves that represent a kind of bell.Then move onto the position which is inside the coeffG tolerance. Then click on Abort. The software will analyse the maximum sharpness position and coeffG position, and will determine the actions (for gate top/bottom screws). Do the actions then re-run the test to move on phase 2.
- 2. final adjustment : Scroll again the complete X axis (don't leave any blank point), and now the maximum of the 3 curves should be aligned and inside the coeffG tolerance. So move the current position inside the coeffG tolerance. Click on Abort to see if the result is good enough. If it is ok, the test is finished. If it is still nok, do the actions listed and run again until the test becomes ok.
5. Test acceptation.
When the Abort button is clicked, the software will calculate the maximum sharpness values and there coeffG position.The test is then accepted if :
- Current position is between coeffG tolerance.
- Distance in pixel between current position and maximum sharpness position at the top is below 4.
- Distance in pixel between current position and maximum sharpness position at the center is below 4.
- Distance in pixel between current position and maximum sharpness position at the bottom is below 4.