1. Test overview.
This test is used to adjust the film carrier (the principal lens having been precisely adjusted using with the 135 film carrier to obtain the maximum of sharpness and of the required enlarging (CoeffG) ratio.The scanner will scan a target film, and will determine a level of sharpness in the middle of the film, as well as the size of the image to determine the enlarging ratio. The user will be asked to adjust the screws of the film carrier to increase the level of sharpness and to obtain the required magnification ratio.
If the sharpness is incorrect, the customer could complain that the scanned images are not sharp enough. If the enlarging ratio is incorrect, the customer could complain that too many of the scanned images are cropped or that there are dark edges on the edge of the scanned images.
2. Test conditions.
This test relates to the 120 film carrier inserted in the scanner.The 120 film carrier must be inserted in the scanner to carry out this test.
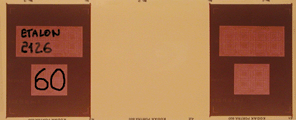
The 120 film Colour Target must be used for this test (ref 070 100 416A) :
No parameter is saved.
3. Pre-requirements.
- 135 Sharpness-CoeffG Test to ensure that the principal lens is adjusted as to obtain a correct sharpness..
- 120 Pre-Sharp Test is accepted to ensure that the presetting of sharpness is made.
- For a phase of adjustment from the start, the high and low screws of the film carrier must be adjusted like those of the 135 film carrier.
4. Test realisation.
Click RUN to execute the test. A message will appear requiring the insertion of the theoretical size of the image (hand written on film, about 2200). When it is done, click on OK A new window will be displayed requiring the insertion of the 120 Colour target film. When the film is inserted (caution: Watch for the direction of the film), click on OK.Note : Colour target film consists of :
- First exposure on which hand written values are noted, in particular the sharpness value to be reached for this film, as well as the size of the theoretical image of this film (for CoeffG).
- Second virgin exposure on which the scanner will calculate the level of sharpness.
- Other exposures identical to the first but not used.
- The part of the second image where the calculation of the level of sharpness was made.
- Part of the first image where one sees the level of sharpness to be reached, size of the theoretical image and where the measurement of the size of the image is done.
SHARPNESS :
The level of sharpness calculated is displayed at the top in box MIDDLE.
In dialog box MIN TO REACH,enter the value hand written on the film (about 70, according to films).
Note : the sharpness value can vary from one scanning to another, sometimes of 4 or 5 points. This due to the the fact that the film is never scanned exactly at the same place.
COEFFG :
The enlarged report/ratio is calculated thanks to the automatic detection of the crosses (which are at the top and bottom of the image) (see Automatic crosses detestion for more information on this subject).The measured value of the size of the image is registered in dialog box MEASURED. This value corresponds to the distance in pixel between the cross top of the image and that of the bottom of the image. The theoretical value is registered in box EXPECTED. The ratio corresponds to the calculated value of MEASURED / EXPECTED.
The right part of the window indicates an history of the positions of the screws of the film carrier in order to remember in which position they were.
click on OK to exit the window , the result of the test is displayed on the screen .
5. Test acceptance.
The test is accepted if sharpness AND the coeffG are correct :
NETTETE :
The sharpness determined in the middle of the film must be higher than 85% of MIN TO REACH.COEFFG :
The coeffG (value Measured / Expected) must lie between 0,9973 and 1,0027.6. Other affected tests.
If the sharpness incorrect, the following tests will be affected :
- 120 Sharp Top-Bottom
- 120 Cal Encoder 2
- 120 Cal RGB-IR