1. Test overview.
This test is used to adjust the film carrier so that the sharpness at the top of film is as close as possible to sharpness in bottom of film.For this, the scanner will scan a target film and will determine a level of sharpness in top and bottom of film. The user will be required to adjust the screws of the film carrier to obtain a acceptable level of sharpness.
If the sharpness at the top is different from the sharpness in bottom of film, this can cause differences in the sharpness of the scanned images.
2. Conditions of the test.
This test relates to the 120 film carrier inserted in the scanner.The 120 film carrier must be inserted in the scanner to carry out this test.
The film 120 Colour Target Film must be used for this test (ref 070 100 417A) :
No parameter is saved.
3. Pre-requirements.
- 120 Sharpness-CoeffG Test is accepted so that sharpness in the centre of film is at his maximum.
4. Test realisation.
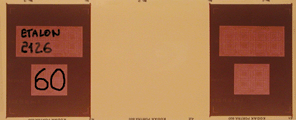
Click on RUN to execute the test. A message will appear requiring the insertion of the 120 Colour target film. When the film is inserted (watch for the direction of the film), click on OK.Note : Colour target film consists of :
- First exposure on which values are hand written , in particular the sharpness value to be reached for this film.
- Second virgin exposure on which the scanner will calculate the level of sharpness.
- Third and fourth exposures identical to the first but not used.
- the part of the second image where the calculated level of sharpness was made.
- part of the first image where you can see the level of sharpness to be reached.
The calculated level of sharpness is displayed at the top in the boxes TOP and BOTTOM. In the box Min to reach enter the value hand written on the film (about 70, according to films). .
Note : the sharpness value can vary from one scanning to another, sometimes of 4 or 5 points. This is due to the the fact that the film is never scanned exactly at the same place.