1. Test overview.
This test is used to adjust the sharpness so that it is can carry out the 2 following tests. Then, a precise adjustment will be made to reach the best sharpness level.For that, the scanner will scan a target film and will determine a sharpness level in the middle of the film. The user will be required to adjust the screws of the film carrier to increase the level of sharpness.
If the sharpness is insufficient at this stage, the 4 following tests will not be carried out.
2. Conditions of the test.
This test relates to the 120 film carrier inserted in the scanner.The 120 film carrier must be inserted in the scanner to carry out this test.
The film 120 Colour Target Film must be used for this test (ref 070 100 417A) :
No parameter is saved.
3. Pre-requirements.
- The position of the 2 high and low screws of the film carrier must be adjusted in a way identical to that of the 135 film carrier.
4. Test realisation.
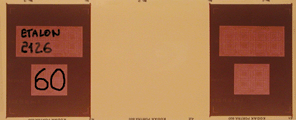
Click on RUN to execute the test. A window will be displayed requiring the insertion of the 120 Colour target film. When the film is inserted (watch for the direction of the film), click on OK.Note : Colour target film consists of :
- First exposure on which hand written values are noted, in particular the value of the sharpness to be reached for this film.
- Second virgin exposure on which the scanner will calculate the level of sharpness.
- Other exposure identical to the first but not used.
the scanner will scann the first and the second exposure of film then will display an image mixing :
- the part of the second image where the calculation of the level of sharpness was completed.
- part of the first image where the level of sharpness to be reached can be seen.
The calculated level of sharpness is displayed at the top in the Middle dialog box. In the dialog box Min to reach, enter the written value on film (about 70, according to films).
Note : the sharpness value can vary from one scanning to another, times of 4 or 5 points. This is due to the fact that the film is never scanned exactly at the same place.
On the right part of the window, a history of the positions of the screws of the film carrier enables to remember their positionning. Click on the position in progress (by 1/8 of turn).
5. Test acceptance.
The test is accepted if the calculated level of sharpness (MIDDLE) is higher than 75% of value MIN TO REACH .6. Other affected tests.
If the sharpness is not sufficient at this stage, the 2 following tests will not work :- 120 Pre-Scan IR.
- 120 Cal RGB-IR.
7. Trouble shooting.
- If The test is rejected with the message " Middle sharp incorrect " : this means that the calculated level of sharpness is not sufficient (that the scanner is not sharp enough). Withdraw the film carrier and adjust the screws high and low of film carrier (warning : when you screw the top, unscrew the bottom and vice versa) Start the test and restart until it is accepted.
- If The test is rejected with the message " Nil value for sharp max " : this means that the value of the sharpness to be reached (Min to reach) was not indicated (it remained at 0). Start again the test and enter the value Min to reach.